Setting up an AWS S3 bucket for your static web site
Target Audience
This post is aimed at relatively capable web/dev ops. People like me. I’ll probably re-read this myself in a few months or a year when I forget how to go about this.
Static Sites are Booo-rrrinnng.
“Static website” sounds so useless and boring, but with javascript and CSS, they are pretty functional. There are options to allow site searches, and you can submit forms and comments through third-party services.
Advantages
OStatic sites are faster, cheaper and generally more secure from hackers (but not necessarily from XSS or end-user attacks).
Amazon Web Services Simple Storage Service (AWS S3) has a unique setup that allows it to respond to name servers as a web site, and though it’s not how we’ve been doing it with Apache/Nginx/MySQL/Postgres on some Linux flavor for the last twenty years, it works well.
I wrote about setting up the mirroring, this one is about configuring the S3 bucket to respond to a request.
Here we go!
Log in to AWS S3. Hopefully you already have an account because frankly, AWS is kind of a pain to set up. Once you get an account secure it, lock it down, save it, guard it. You don’t want to have to go through that again. You’ll want to hand that login information over to your most trustworthy grandchild on your deathbed. (Lol, as if any of this won’t be ancient history in year!). Once logged in …
Create a bucket
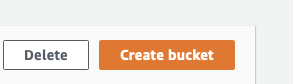
Click “Create Bucket”
Configure the new bucket
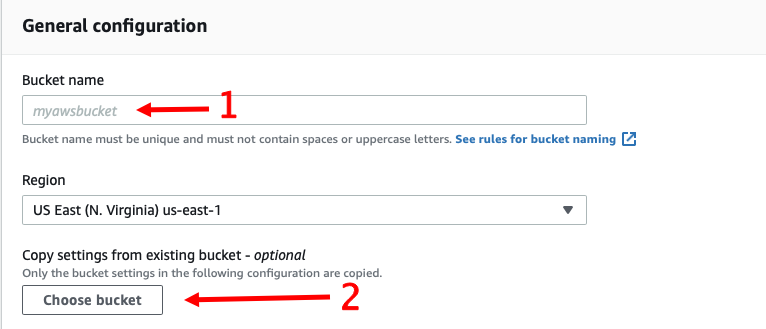
1. Use your domain name. I’m setting up ‘huckfacedg.com’, so I added that. 2. If you already have a bucket configured for a different web site, choosing it here makes this a lot easier. But, if that’s the case, you wouldn’t really need these tips, would you now?
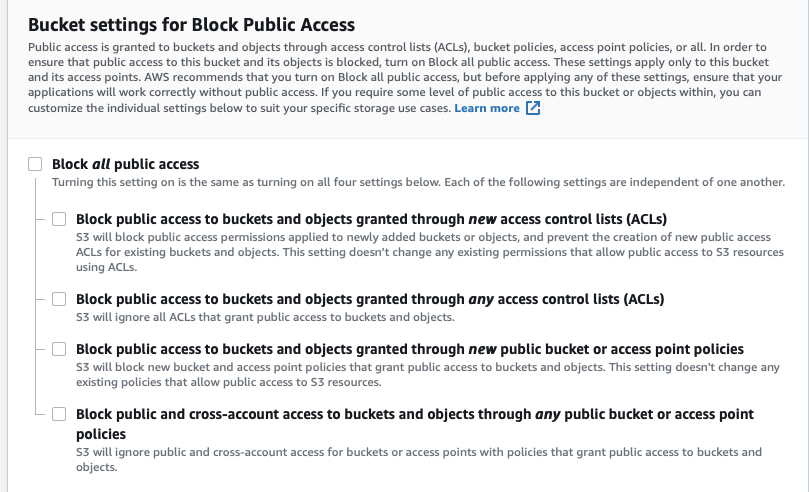
Uncheck (gulp!) “Block all public access”. It’s scary, but (hopefully!) necessary, because the public needs to be able to download the HTML, CSS, js, jpg, etc… kind of the point… The ACL system for AWS is confusing to me, so please read up on it and don’t just uncheck this without reading up. Okay? Did you read up?
You’ll have to click the “Acknowledge” box, too. I don’t enable versioning, I don’t tag anything and I didn’t set up server-side encryption (SSL between the user and S3 will work, though. That’s in the upcoming DNS configuration).
Click “Create Bucket” at the bottom and … Congratulations! You’re about 1/4 done. I know, I wish it were easier. It’s awesome when it’s all set up though.
Uploading Something
The “create bucket” button should have done some work and then sent you back to the S3 landing page with a list of all of your buckets (you may have just the one you added, though). It should be linked. Click it.
You should be on the “Objects” tab in the tab bar. AWS engineers call HTML, CSS, js, jpg, png, etc “Objects”. Let’s upload some Objects !

Go through the process of uploading some static HTML. If you have a whole static site ready to go, by all means, go forth and upload. If you don’t, just edit a file on your desktop called ‘index.html’, add in ‘hello, world!’ save and upload. We’ll come back to this in a bit. If you get lost in this admittedly less-than-straightforward UX/UI, once you feel like you are done, and want to see for sure, somehow trek back to the Objects screen and you should see the file(s) you uploaded listed there.
**Please note: this is not the way I recommend you update your web site, it’s just to get it seeded.
Promoting the Bucket to a Website
So far, this is just a plain ole S3 bucket. Businesses use these to cheaply store all kinds of digital data (though not usually with wide open, public permissions for reading that data).
Now we need to let S3 know it should respond to requests from web browsers.
Click “Properties” from the tab bar.

Scroll, scroll, scroll… all the way to the bottom. Under/next to Static Website Hosting **click the “Edit” link. When it loads, click “Enable”, then “Host a static website”. I put “index.html” in **Index document and “error.html” under the Error document.
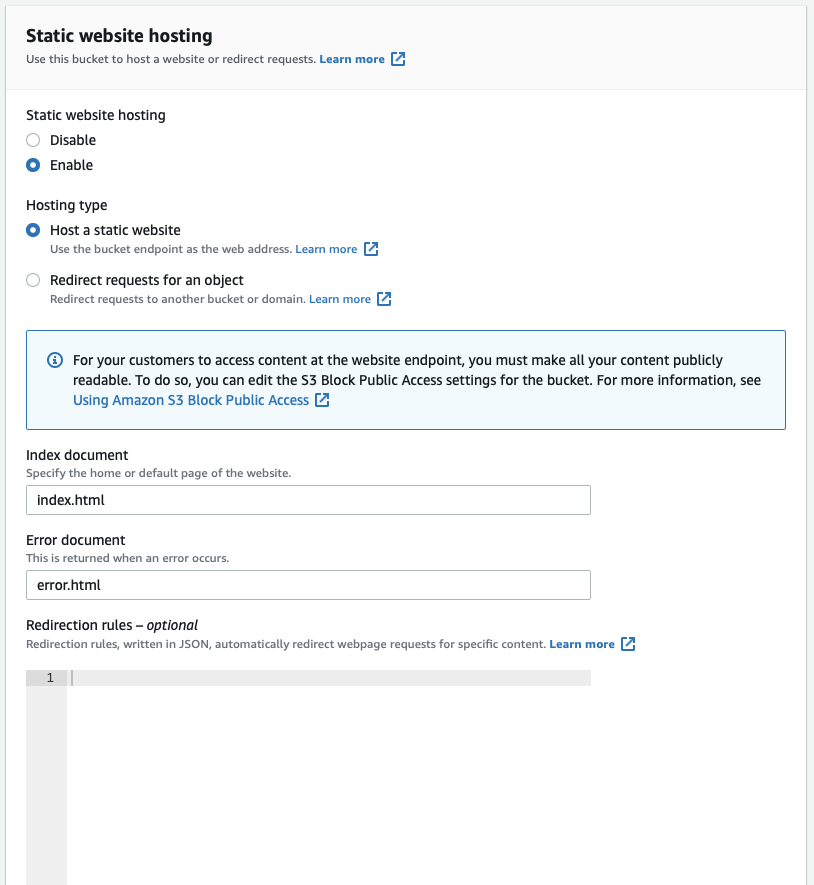
Note: don’t do “/error.html” or “/index.html” or “/error/index.html”. Instead, it would be “error.html” or “index.html” or “error/index.html” (note the lack of an opening forward slash). That cost me about 30 minutes.
To redirect errors to somewhere, you could set up this rule:
[
    {
        "Condition": {
            "HttpErrorCodeReturnedEquals": "404"
        },
        "Redirect": {
            "HostName": "huckfacedg.com",
            "ReplaceKeyWith": ""
        }
    }
]
You are welcome to leave the HostName as “huckfacedg.com” but if you have a 404 error on your site, it’s gonna redirect your user to my web site and that will be confusing, to say the least. They might like it, though. Huckface is a web comic/video story using toy photography, and it’s about disc golf.
Yeah, probably you should change it.
If you don’t want to redirect 404 pages, but just want the site to return a 404 http code, don’t add that redirect. Just leave the box blank. I recommend leaving the box blank so that instead of bad link returning a 301 redirect, it shows that error page but reports a 404. That way you can use a link checker and/or set up Google Tag Manager to send you 404 errors when they happen.
Then click “Save Changes” and you’ll be back at the top of the Properties page.
Before we leave this page, scroll all the way back down to the bottom and copy the URL that now appears there (for reference, mine is http://huckfacedg.com.s3-website-us-east-1.amazonaws.com). Save it somewhere like in notepad or something. We’ll need it in a minute, and then again about ten minutes after that.
Bucket Policy setup
Now, click “Permissions” on the tabs across the top

Scroll down a bit to Bucket Policy , click edit, and paste in this:
{
    "Version": "2012-10-17",
    "Statement": [
        {
            "Sid": "AddPerm",
            "Effect": "Allow",
            "Principal": "*",
            "Action": "s3:GetObject",
            "Resource": "arn:aws:s3:::[YOUR DOMAIN/BUCKET NAME]/*"
        }
    ]
}
Replace [YOUR DOMAIN/BUCKET NAME] with your domain/bucket name (I added ‘huckfacedg.com’, not that full URL with the domain ‘amazonaws.com’ in it). Click Save.
The First Double Check
Okay, let’s see where we are. We should be able to click the long, un-user-friendly AWS URL for your site and see the index.html file we uploaded. If we do, then we can turn to setting up the DNS and all that.
So, find that URL you saved (like http://huckfacedg.com.s3-website-us-east-1.amazonaws.com) and copy it to your browser.
Do you see the index.html file you uploaded before?
If “yup” then you have it working. If “nope” then retrace your steps. Reach out to me if I left something crucial out (links to my socials are near the bottom of the page, just ping me there).
Play it again, WWW
Now, we need to do the SAME thing for the ‘www’ version of the page. This isn’t strictly necessary… if you don’t care of people get a DNS error if they enter ‘www.your-domain.com’ and are okay with people only getting to ‘your-domain.com’, then you can stop here. Otherwise, here’s one more section.
Configure the new bucket
Do again the steps
- “ADD A BUCKET”, but prepend ‘www.’ to your domain (in my case, www.huckfacedg.com), then
- “CONFIGURE THE NEW BUCKET” in the same way – uncheck ‘Block all access’, Acknowledge, then click “Create”…
Upload Something
You don’t need to upload anything in this bucket.
Promoting the Bucket to a Website
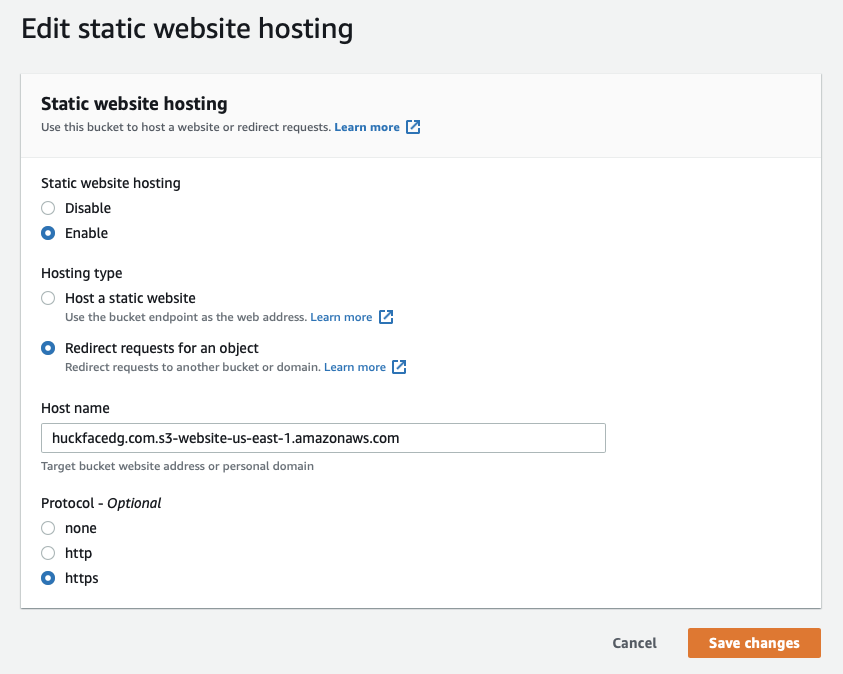
Hit the Properties tab, head back all the way to the bottom, click “Edit static website hosting”, choose “Enable”, then, this time around, choose “Redirect requests for an object”, then paste your host name (without the WWW; paste the host where you want the redirect to go to…), choose your protocol (almost for-sure https).
Save your changes and test it out. I tested it by going to http://www.huckfacedg.com.s3-website-us-east-1.amazonaws.com/and it redirected to http://huckfacedg.com.s3-website-us-east-1.amazonaws.com just as planned. (**note: **since this time, the full DNS is set up, so the first link now goes to https://huckfacedg.com/)
Onforth and Upforth!
Now we have about 2/3 of the tasks completed. How long it takes will depend mostly on luck, but also depends a little bit on following directions and understanding things. Hopefully I handled my end well.