Setting up DNS for your AWS S3 static web site
Target Audience
This post is aimed at relatively capable web/devops. People like me. I’m not going to remember everything, so I’ll probably re-read this myself in a few months or a year when I forget how to go about this.
The Host
I use Cloudflare to host my DNS. There are other ways to accomplish this, including hosting it yourself (don’t, though, DNS is a hardy pain-in-the-arse and you’ll be miserable. Use a capable DNS provider and sleep at night).
If you are in the market for a DNS provider, I do recommend Cloudflare. But even if you don’t use Cloudflare, hopefully this will help you decipher your DNS provider. And, whomever you are with is probably fine. I definitely wouldn’t switch unless you are unhappy with your current crew.
A Note About Your Registrar
If you just registered your domain name, you’ll probably have to change the DNS record at the registrar where you bought the domain. There needs to be some record of which DNS servers are the authority for your domain, and you need to tell the registrar this so they can spread the word. Cloudflare names theirs jocelyn.ns.cloudflare.com and wesley.ns.cloudflare.com .
Competition
I’ve used Cloudflare for a long time so I don’t even really know the landscape of their competition. All I know at this point is fax machines, modems, printers, sendmail configuration anything on :53 hates me. Cloudflare is my buffer between :53 hatred.
Let’s go!
You’ll need to add a record for you domain. In Cloudflare, DNS is a slice of what they do, but the main thing I use them for. However, there are a lot of buttons across the top. We’ll cover these three today:

DNS
Click the DNS tab. You’ll see an area to add records. We are going to add two “CNAME” records, and nothing else right now. For your domain, you might need to add multiple records for various things… email, other servers, maybe a verification record, etc. Click “+Add record”

Chose “CNAME”, enter your domain name in “Name” (1) and the URL from the S3 bucket setup post in “Target” (2) . Then click “Save” (3) .

For the record, my full “Target” was ‘huckfacedg.com.s3-website-us-east-1.amazonaws.com’. I accidentally put the “http://” in there at first and it complained until I removed it.
Then, click “+Add Record” again, and do the same thing, but this time, in the “Name” field, put “www”. In the Target, put the version of your AWS S3 bucket with the ‘www’ on it. Mine looks like this now:

Caching
This is only applicable for Cloudflare. If you use another provider, they might have something for you to use. Cloudflare will copy and cache your web site and server much of it from their distributed servers. This makes it seem even faster. However, at this stage, you might want to turn off the caching so that it doesn’t mess with your brain when you are testing out your site.
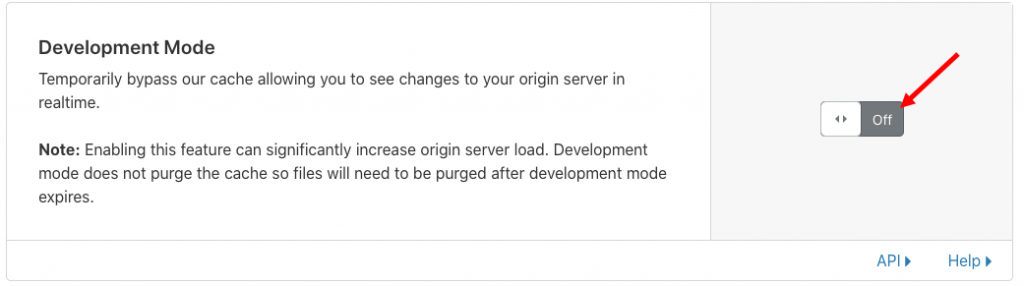
When your site is all ready to go, come back and turn development mode back to “Off” (meaning the cache will be “On”).
Page Rules
S3 doesn’t serve SSL to the browser, but Cloudflare can. You really want to have SSL on your web site nowadays, and Cloudflare makes this easy for you. But, you want to make sure all attempts to go to just “http://your-domain.com” are redirected.
Click “Page Rules” at the top. Then click “Create Page Rule”

Add *your-domain.com/* just like that (asterisk, domain, slash, asterisk), choose the setting “Always Use HTTPS”.
Any URL to your domain (www version included) will redirect to https:// (if it isn’t already). Click “Save & Deploy” and you are done. You can do other things from this page. It’s good for tweaking things, doing redirects, etc.

FIN
Hope that helps!